
For reference--Angry Birds Dress Makes Big Fashion Statement The dress I'm copying was worn by Teija Vesterbacka, wife of a Rovio executive, to a dinner at the Finnish Presidential Palace.
The dress itself is really quite simple. It's one shouldered, floor length with no hem seam, and a separate drape of fabric (obvious in a video that I haven't refound) from the neck to the hem, with a bird peeking out from beneath the drape.
I used my 1950s sundress base, made it one shouldered, and added skirts just like I did on Eowyn's Travelling Coat that I made many years ago.
The dress is made of silk charmeuse, the bodice is lined with Egyptian cotton, and the dress is fully lined with China silk.
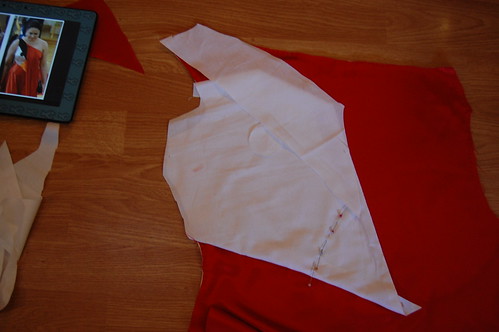
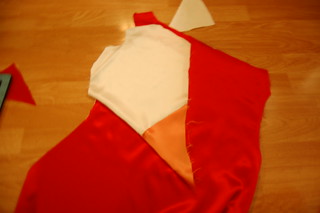
I cut out a waist length bodice in cotton. I cut out the front of the dress on the fold, with two shoulders. It was much easier to cut it with two shoulders since it was on the fold, and this allowed for any slight wonkiness in the charmeuse.
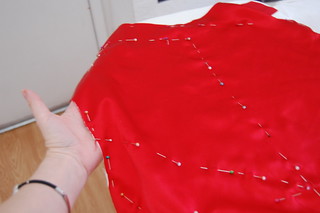
I then pinned the lining to the wrong side of the charmeuse at the neckline, sides, and bottom edge of the lining. I also pinned the shape of the bird's head into the charmeuse. I then basted the shape of the bird's head.
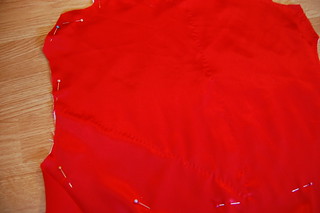
Next, I basted the edges. This is much easier to see from the back. You can also see the second shoulder. I left this on until I was done basting, once again because charmeuse is wiggly. I did end up trimming the lining once the dress was done as there was a line where it ended.
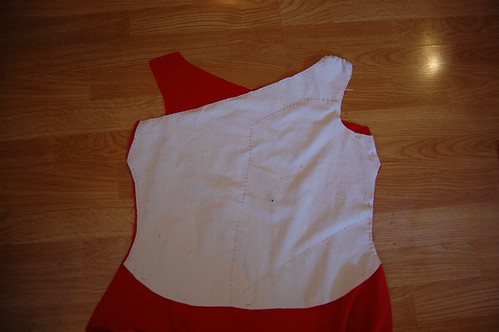
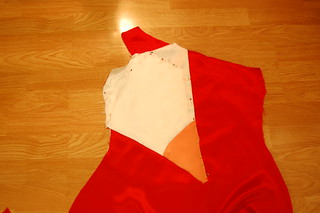
Next came the scary part--I cut the second shoulder and the space for the bird's face out.

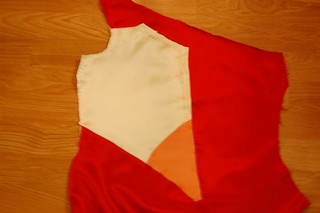
I then used the cut out piece to create a pattern for the white part of the bird face. I added seam allowances to the center, top, and bottom, but left the side and armscye without seam allowances.
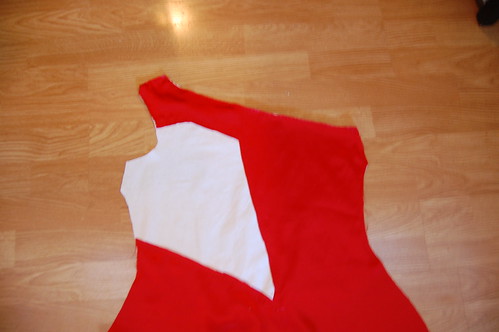
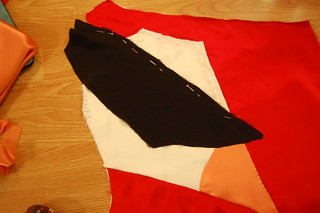
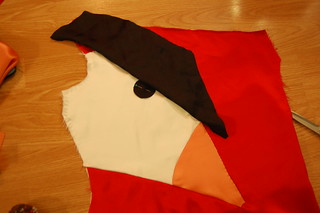
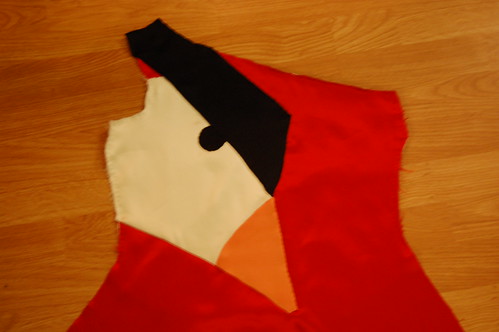
Next, I laid the bird face over the dress, marked the beak with pins, and added a circle for the eye and a shape for the eyebrow. I cut the face shape a half inch from the line of pins for the beak, and then used that piece to make a beak shape.
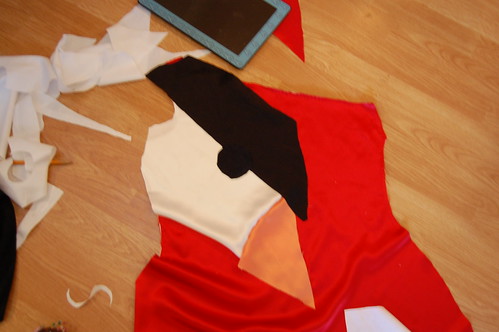
All the pieces laid out to make sure I like them! The beak is pinned to the face in this picture.
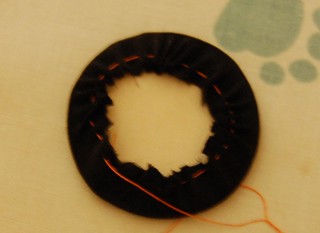
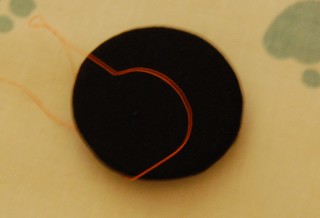
I made the eye like a covered button. I gathered the silk around the edge, put a wooden disk in the middle, pulled it up, ironed it, and took the disk out. A very easy way to get a neat circle!

I then sewed the beak to the face and put it right side to right side on the bodice. I sewed that seam down and flipped the fabric up.
You can see that I cut the white part out a little bigger for safety's sake! I then pinned the center front under, the part of the top that isn't covered by the eyebrow, and the side seam and sewed it all into place.
I then pinned the eyebrow into place, and before sewing it, positioned the eye. To sew the eye, I very carefully took a stitch into the white fabric a few millimeters inside the eye's circumference and then took a stitch in the seam allowance underneath the eye, so that no stitches would show. I repeated this for the top of the eyebrow.
And we have a bird face!
And here end my pictures. The rest is very straightforward though, and I'll do my best to explain in just words.
I sewed the front to the back, right sides together as normal. I left the left (non bird face) side seam open for a regular zipper, which I put in by hand. I then made a lining in China silk to the same pattern, put it in wrong sides together, turned the edges in and sewed it to the zipper, and bound the armholes.
The drapery in front is a single rectangle with a double box pleat. I sewed it to the neckline before binding it. It's very, very heavy and made the dress fall forward. Now, what I should've done was take a few darts in the neckline, but I wasn't going to take everything out as I had thought binding would take care of this. I figured out that tacking the drapery to the bodice under the top pleat would help, so I did that, and gathered it up just a tiny bit. Not so much that it wouldn't be smooth, but enough to give it some support.
Then I hemmed it, which is a seriously atrocious thing to do on your own. I had made sure to cut it too long--it's too easy to make these things too short! I used rayon seam binding instead of turning the top in on itself. The lining is hemmed by machine and probably not at all even. It doesn't show under the skirt though, so all is good!
I wore it to the ice cream social at Costume College, it was was the most fun thing to wear ever. The finished dress can be seen here!.
No comments:
Post a Comment